Using FurMark utilizes fur rendering algorithms designed to push your GPU to its limits and measure its synthetic performance. GPU stress tests such as FurMark are designed to push your card to consume the maximum electrical power usage that no real game or program should. It is therefore a synthetic test for new hardware’s cooling capabilities, finding its thermal throttling threshold and especially useful for quick testing custom water cooling kits.
Is FurMark Dangerous?
FurMark is an intensive OpenGL benchmark test that was designed to test your GPUs stability and limits. No game currently available is going to do that in the same manner that Furmark does. So, Furmark is technically not a real-world picture of your graphics processing capabilities. The amount of strain that FurMark would place on your PC system could potentially wear out components if you test your system over and over. However, if you wanted to test your brand new GPU and perform a single test to see if it performs as it should while still under a manufacturer’s warranty, it should be okay.
How to Download FurMark
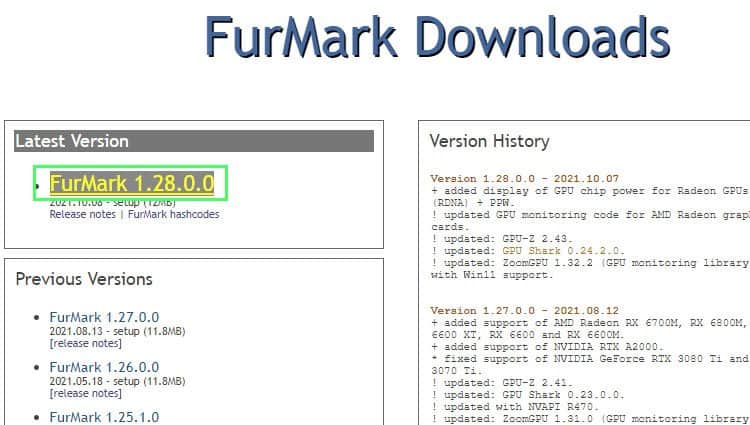
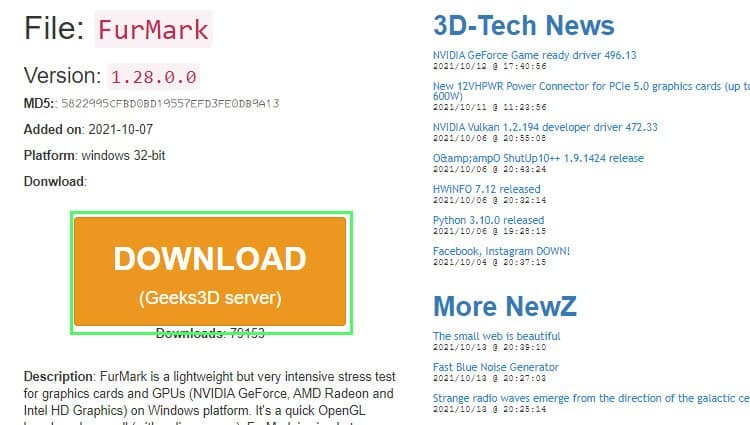
To download FurMark go to the official site and click on the green button that opens its DOWNLOAD page. Next, select the version you want to install. You will then be forwarded to this site, in which you can click the large orange button labeled “DOWNLOAD”. After selecting the version to download, go to your Downloads folder and double-click the program to install.
How to Use FurMark
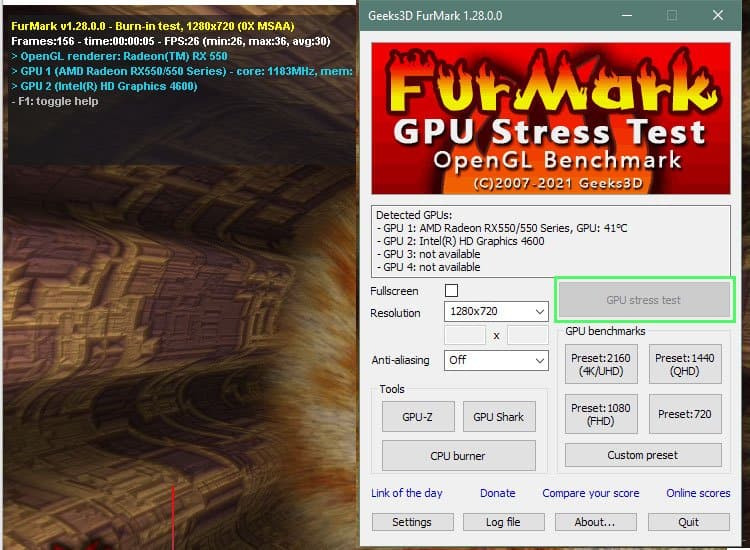
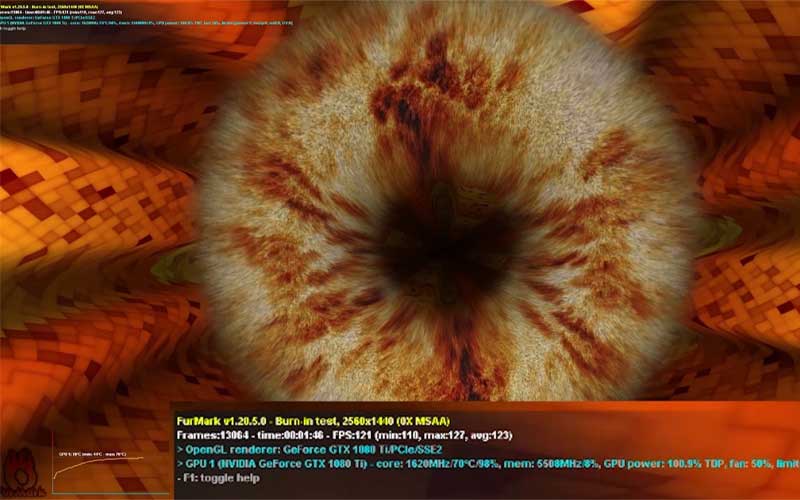
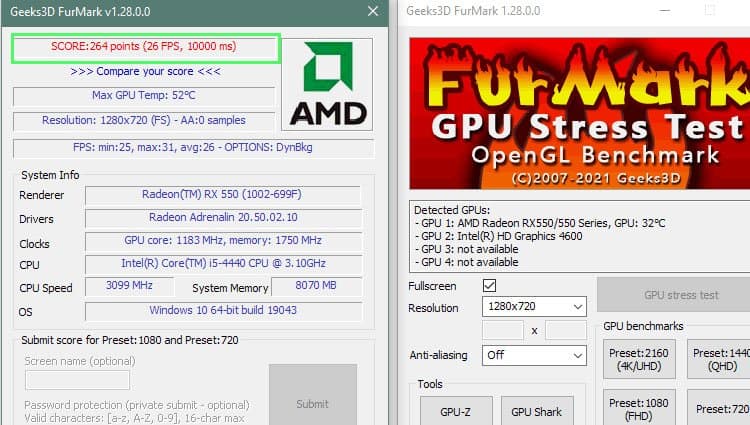
To run FurMark, you can leave the default test settings or change them below. You can change the resolution, Anti-Aliasing, and even presets for 4K, Quad-HD, Full-HD, and Preset 720. You can even create personal preset settings. Your resolution should match your monitor settings, and changing the Anti-Aliasing doesn’t need to be changed unless you want to max out your stress test even more. Below the Anti-Aliasing options are the tools included with FurMark that can be used for monitoring purposes. Clicking on GPU-Z and GPU Shark lets you view the temperature, power use, load, and several other stats. I suggest using these to keep a close eye on temperatures. If you notice the temps climbing above 80°C, shut it down to prevent damage to your GPU. After you have chosen your preferred settings, press the GPU stress test to perform the benchmark. The test screen should look like the one below.
How Long Should I Run FurMark?
As long as your GPU temps max out while running Furmark, there is no need to keep the benchmark running. I ran the burn-in benchmark for around 300000ms which was 5 minutes, and the temp was not rising above 72°C when I ended the test. Others have stated on Reddit that they have run tests for about an hour each time and never experienced any problems, at least on default settings.
How to Change FurMark Benchmark Duration?
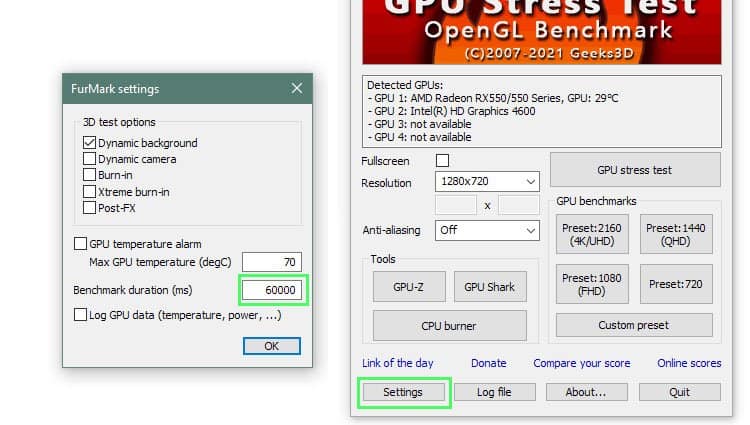
To change the benchmark duration, click “Settings” at the bottom left of the FurMark window, and a box will open. In this settings box, find Benchmark duration preset to 60,000 ms. You can change this timeframe to however long you want to run your benchmark. Then, you must use the Custom Preset Button to apply these settings in the Benchmark.
How to Select and Change GPU in FurMark
The only way we have found to test multiple GPUs in FurMark is to change slots of the cards to the primary slot on your motherboard. FurMark can detect multiple GPUs but is unable to test more than one GPU at a time.
How to Enable Integrated GPU in FurMark
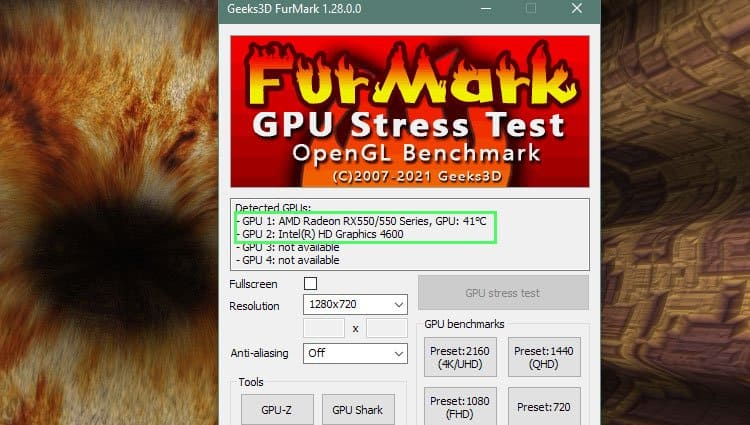
Using FurMark to benchmark an integrated GPU works the same way as a separate graphics card. FurMark lists the GPU the same way it would for a non-integrated card, as you can see below in the screenshot of the benchmark performed.
What is a Good FurMark Score?
I have found a wide range of scores available on this website linked from FurMark. Scores listed below are of the highest available benchmark scores at each pixel resolution level. As you can see from the benchmarks listed above, the higher the pixel resolution, the lower the benchmarks are. Perhaps a “good” score would fall near about these scores as the highest number would be considered overkill.
Where is the FurMark Score Located?
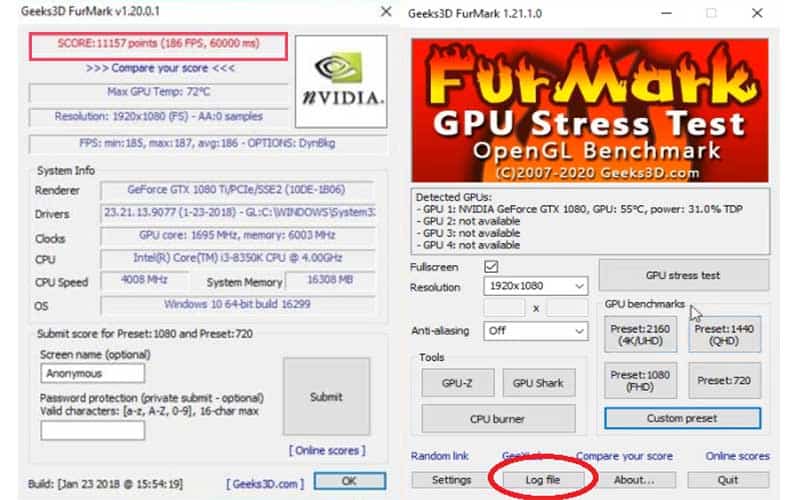
Upon completing the FurMark benchmark, a new box will appear and look like the one below. On the first line of the box will be your score; as you can see, mine was 11157 running at a resolution of 1920×1080 for only 1 minute. In the right image, you can see that the log file is now present after completing your test. The log file contains everything from CPU information, CPU speed, system memory, OS, GPU, GPU memory, memory type, graphics driver version, GPU temperature, fan speed, and Open-GL information. On the previous AMD RX550 machine, the scores were much more miniscule, as expected of that GPU.
How to Check Errors in Furmark
Besides viewing your score and seeing your systems and GPU stats, you can also check for errors with FurMark. Simply click on “Log File” at the bottom of the FurMark window, and a new word document will open. In this window, you will be able to view everything found during the test, including any errors that may have occurred or were discovered during the benchmark.
Solving Common Issues with FurMark
FurMark won’t start
This could be a simple case of having an outdated driver for your graphics card. Consult the FurMark website to make sure that your graphics card is OpenGL 2.0 compliant. Be sure that your GPU has the latest software before you start FurMark. If this doesn’t work, uninstall FurMark, restart your PC, and re-install it.
When running FurMark, the clock won’t go above a mark:
If you find that the clock speed of your CPU is not reaching the maximum limit, you might need to check your Advanced Boot Settings to verify that the “PCI Lock” is checked.
PC Shutdown when using FurMark
A reset could indicate a power supply insufficiency that caused GPU to become unresponsive. Check your log file to investigate this issue further.
FurMark Blue Screen (BSOD)
A BSOD could indicate that you have an overheating problem initiating an exception because the GPU became unresponsive. You could remove the side panel of your PC, verify everything is clean and clear, and maybe even use a fan blowing into your pc to increase the cooling.
FurMark Black Screen
Black screens are generally an issue with a lack of cooling, among other dire issues. Try increasing the GPU fan speed to high performance and max fan speeds. Check the log files too.
FurMark Freezes
If you are getting freezes during the benchmark, it is a clear indicator that you need a better cooling option, either by upgrading the cooling fan or moving to a liquid cooling option.
FurMark Killed My GPU
It is important to realize that FurMark was designed to put an unrealistic amount of stress on the GPU. If you have overclocked your GPU and then decided to run FurMark, the possibility of killing your GPU increases. It usually means a weak component of the GPU wore out but is unlikely for most modern GPUs.
FurMark not detecting GPU
FurMark should detect all of your GPUs. If not, ensure that you have the latest version of FurMark, version 1.26.0.0; if you choose to use an older version, un-check the post-processing box in the lower-left corner to load multiple cards. On version 1.8.0, changed to a “Run Mode” box, and the option was called “Post FX.”
FurMark Requires OpenGL 2.0
FurMark is an OpenGL 2.0 benchmark and requires a compliant graphics card to perform a benchmark test. Nvidia GeForce 6 or higher, AMD/ATI Radeon 9600 or higher, Intel HD Graphics 2000/3000, or an S3 Graphics Chrome 400 series with the latest drivers.
FurMark Hotkeys
Hotkeys have been added to FurMark, including (P) to enable/disable post fx rendering and (T) to enable/disable temperature graphs rendering. FurMark also offers command-line parameters.
FurMark Alternatives
Heaven is an alternative to FurMark and functions very much the same in pushing the GPU to its very limits while verifying its stability. Heaven was developed and published by UNIGINE Corp, and unlike FurMark’s furry donut, Heaven uses more real-world 3d game-like visuals while performing the benchmark. They also have a modern benchmark more suited for latest GPUs called Superposition. Below is its benchmark footage. 3DMark is another alternative to FurMark and Heaven, featuring a full benchmark suite that offers a free version, an advanced edition for $29.99, or a professional edition for $1495 per year. Along with hardware monitoring like FurMark and Heaven, 3DMark includes an estimated game performance feature that will relate your score to frame rates you can expect in a selection of popular games. Kombuster is MSI’s exclusive benchmark tool, and it’s based on the FurMark software. It also supports OpenGL or Vulkan. Kombuster also utilizes MSI afterburner to play with overclocking settings to help you find that perfect compromise of power and stability.
What’s the normal temperature of FurMark?
GPUs below 90°C are considered safe during benchmark testing. Temperatures running under 65°C are considered exceptional. When running FurMark on my GeForce GTX 1080 Ti, I got a max temp of 72°C by the end of the test.
What is Antialiasing in FurMark?
Anti-Aliasing is a GPU technique that smoothes jagged edges of pixels to make them look better and more realistic. FurMark allows multisample anti-aliasing (MSAA) to test your GPU. The higher settings significantly reduces the number of frames per second output, thus thoroughly testing your GPU capabilities. A good system should run 2x anti-aliasing and produce a minimum of 30+ FPS.